Introduction
Difficulty Level: Beginner
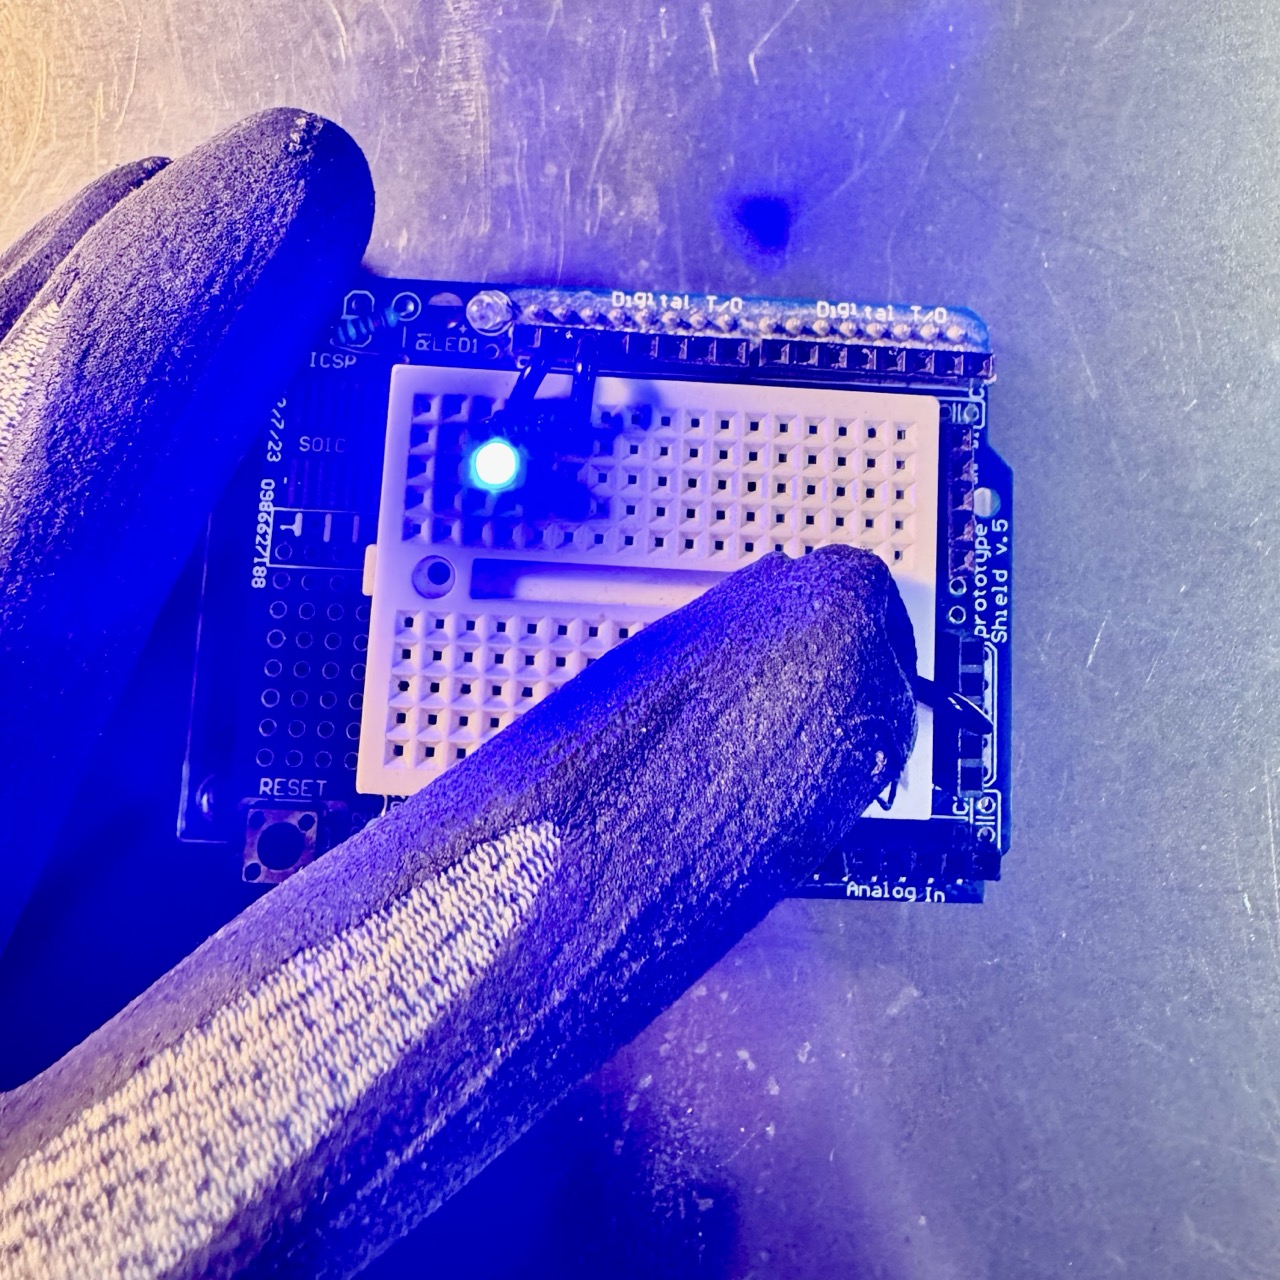
This tutorial will teach you how to control an LED with a button using the Arduino Minima R4. When you press the button, the LED lights up; when you release it, the LED turns off. This project is perfect for beginners to learn basic Arduino programming and circuit design.
Required Components
Wiring Setup
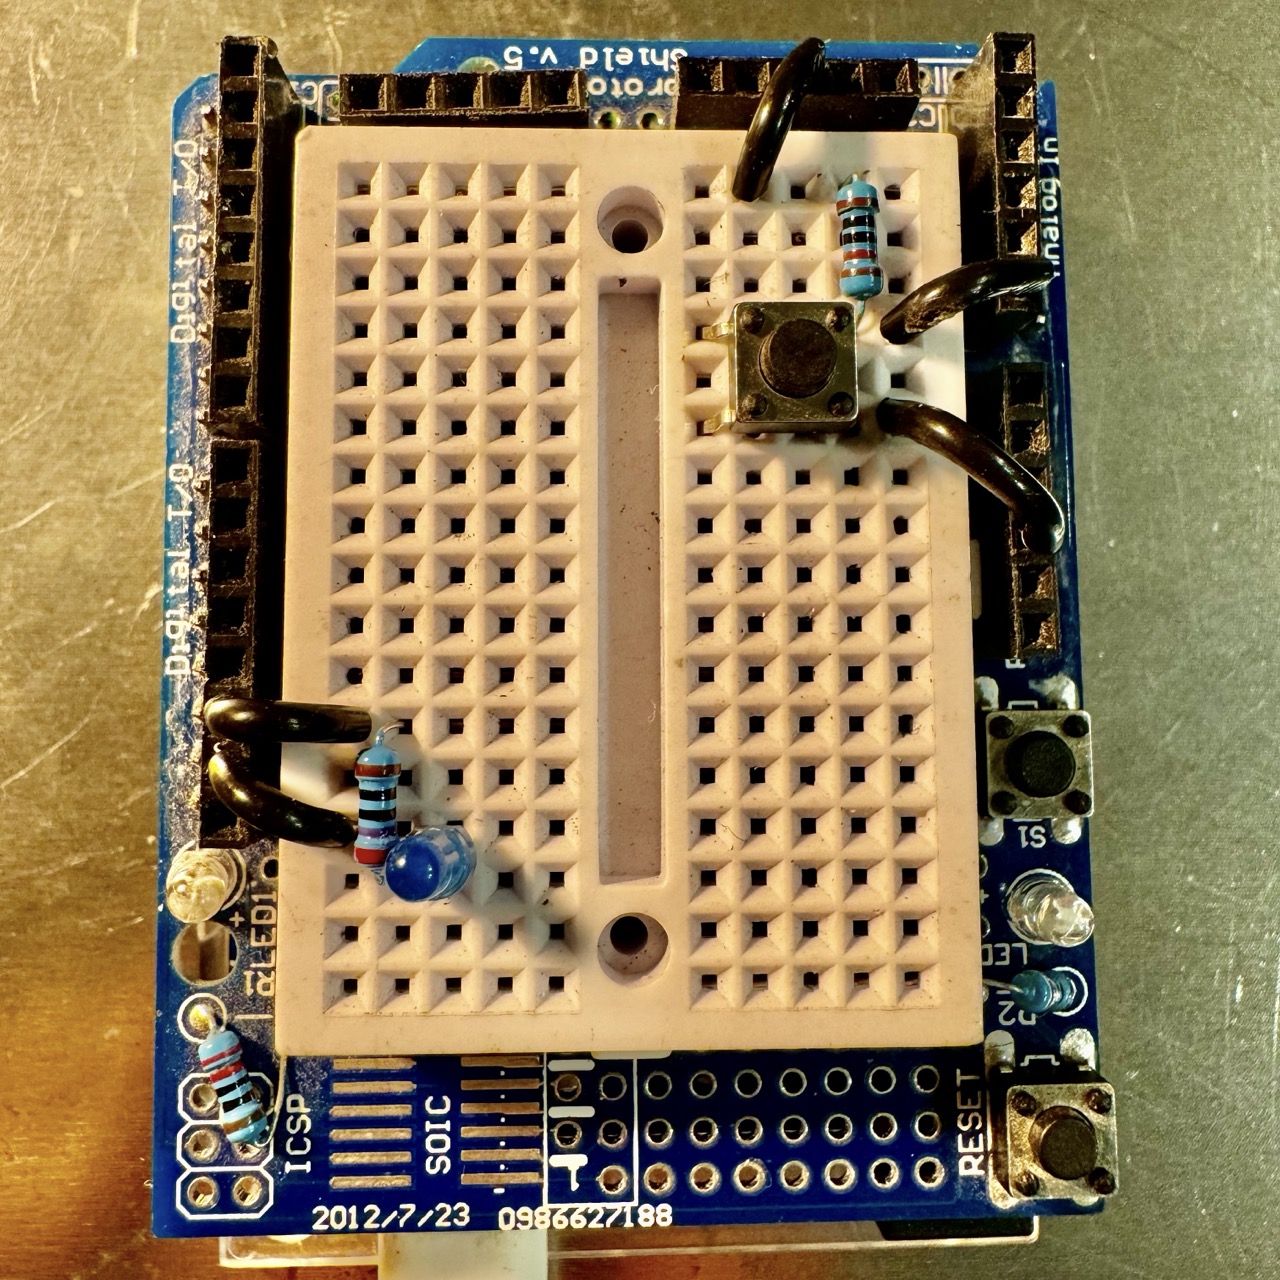
Follow the steps below to set up the wiring:

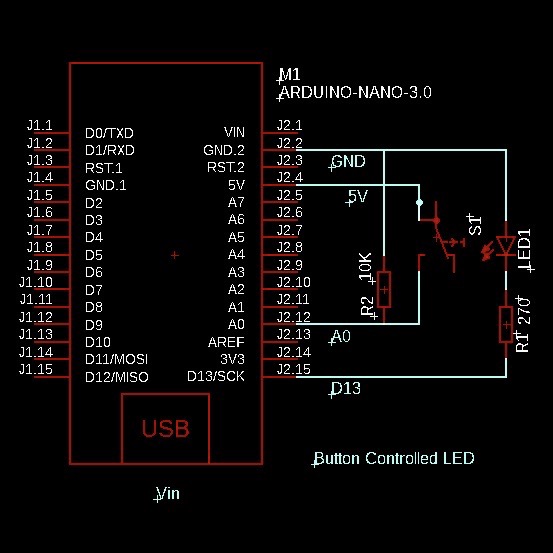
- Button: Connect one side to analog pin A0 and ground (via a 10kΩ pull-down resistor). Connect the other side to the 5V pin.
- LED: Connect the anode (long leg) to pin 13 through a 270Ω resistor. Connect the cathode (short leg) to GND.

Code Explanation
The Arduino code checks the button state using digitalRead(). When the button is pressed, the LED turns on, and when released, it turns off.
Key Functions
pinMode(): Configures the button pin as anINPUTand the LED pin as anOUTPUT.digitalRead(): Reads the state of the button pin to determine if it’s pressed.digitalWrite(): Sets the LED pin toHIGH(on) orLOW(off) based on button input.
Arduino Code
Copy and upload the code below to your Arduino Minima R4:
// Button-Controlled LED on Arduino Minima R4
const int ledPin = 13;  // Pin connected to LED
const int buttonPin = A0; // Pin connected to button

void setup() {
  pinMode(ledPin, OUTPUT);  // Set LED pin as output
  pinMode(buttonPin, INPUT); // Set button pin as input
}

void loop() {
  // Read the button state
  int buttonState = digitalRead(buttonPin);

  // Turn LED on or off based on button state
  if (buttonState == HIGH) {
    digitalWrite(ledPin, HIGH); // LED on
  } else {
    digitalWrite(ledPin, LOW);  // LED off
  }
}
Upload and Test
- Connect the Arduino Minima R4 to your PC using a USB cable.
- Open the Arduino IDE and paste the code above into the editor.
- Select "Arduino Minima R4" as your board type and choose the correct port.
- Click the upload button to load the code onto the Arduino.
- Press and release the button to see the LED turn on and off.

Troubleshooting
If your project isn’t working as expected, here are some common issues and how to resolve them:
1. LED Won’t Turn On
- Incorrect Wiring: Double-check the LED connections. Ensure the anode (long leg) is connected to pin 13 through the 270Ω resistor and the cathode (short leg) is connected to GND.
- Burnt-Out LED: Test the LED with a multimeter or connect it to a known power source with a resistor.
- Pin Configuration: Ensure pin 13 is set as an
OUTPUTin the code usingpinMode(ledPin, OUTPUT);.
2. Button Doesn’t Work
- Misaligned Wiring: Ensure one side of the button is connected to pin A0 and the other to 5V, with a 10kΩ pull-down resistor connected to GND.
- Button Functionality: Use a multimeter to test if the button is creating a connection when pressed.
- Incorrect Code: Ensure the button pin is set as
INPUTin the code usingpinMode(buttonPin, INPUT);.
3. Code Won’t Upload
- Wrong Board Selected: In the Arduino IDE, ensure the board type is set to "Arduino Minima R4."
- Port Not Detected: Check that the correct COM port is selected in the Tools menu of the Arduino IDE.
- Faulty USB Cable: Use a USB-C cable that supports data transfer, not just charging.
4. Erratic LED Behavior
- Floating Pin: Ensure the button pin (A0) is pulled down to GND using a 10kΩ resistor to prevent random signals.
- Loose Connections: Check that all jumper wires and components are securely seated in the breadboard.
- Power Supply Issues: Ensure your Arduino Minima R4 is receiving stable power from the USB connection.
5. Debugging with the Serial Monitor
If the above steps don’t solve the problem, use the Serial Monitor in the Arduino IDE to debug:
- In the
setup()function, addSerial.begin(9600);to initialize serial communication. - In the
loop()function, addSerial.println(buttonState);to check the button state readings. - Use the Serial Monitor to verify that the button state changes from
LOWtoHIGHwhen pressed.
6. Need More Help?
If you’ve checked everything and still face issues, consider:
- Re-reading the tutorial for missed steps.
- Visiting the Arduino forums for additional guidance.
- Testing components individually to isolate the problem.
Conclusion
Congratulations! You’ve successfully completed a fundamental Arduino project where a button was used to control an LED. This tutorial introduced you to:
- Basic circuit design principles, such as using resistors to protect components and pull-down resistors to stabilize inputs.
- Key Arduino functions like
pinMode(),digitalRead(), anddigitalWrite(). - Interfacing input devices (buttons) with output devices (LEDs).
With this foundational knowledge, you can now explore more advanced projects. Here are some ideas to expand on what you’ve learned:
- Use multiple buttons to control multiple LEDs or other devices.
- Add functionality such as toggling the LED state with each button press, rather than just turning it on or off.
- Incorporate other components like buzzers, potentiometers, or sensors to enhance your project.
- Integrate a debounce algorithm to improve button reliability and eliminate unwanted rapid state changes.
- Control the LED wirelessly using a Bluetooth or Wi-Fi module.
By gradually building more complex circuits and writing more advanced code, you’ll gain a deeper understanding of electronics and embedded systems. Remember, the skills you’ve practiced here form the building blocks of countless creative and practical applications.
If you encounter any challenges while exploring further, revisit the troubleshooting section or explore online resources like the Arduino forums and tutorials for additional support.
Keep experimenting and have fun with your Arduino projects!
